
Using Azure Functions with Astro and Entra ID Authentication
Apr 22 2024 - Add dynamic data support with Azure Functions with your Astro (SSG) and Azure Static Web Apps. All this, plus authentication & authorization with Entra ID.
Let’s dive into the world of Astro, Azure Functions, and Azure Static Web Apps. We’re going to add dynamic data to an Astro site (rendered as a static site) using Azure Functions for dynamic data. We’re also going to add authentication and authorization to the site using Microsoft Entra ID built-in authentication. While this post uses JavaScript for Azure Functions, you can use TypeScript, PowerShell, C#, or any other language that Azure Functions supports. By using this approach, it removes the need to deploy an Azure Web App just to support the Server Side Rendering (SSR) of which Astro does amazingly supports.
We’re going to leverage parts of a previous post and sample project that added authentication to an Astro site using Microsoft Entra ID EasyAuth with Azure Static Web Apps.
If you haven’t read that post, you can find it here.
A completed version of this project (AstroFuncBall) can be found in GitHub: https://github.com/conradagramont/blog/tree/main/AstroFuncBall
Table of Contents
- Uses Cases
- Limitations
- Prerequisites
- Our Scenario: Baseball and Weather
- Create the Astro Project
- Add the Azure Functions API
- Verify Astro and Azure Functions
- Configure Azure Static Web Apps Authentication
- Resolving TypeScript Issues
- Checkpoint: Astro, SWA, and Azure Functions
- Sample Project: Clone & Run
- Sample Project: About the App
- Deploy to Azure Directly
- Redeploying to Azure Tips
- What’s Next?
- Acknowledgements & Terms
Uses Cases
Here are some examples scenarios for websites where this might be useful:
- Inventory & Projects: You want to show inventory or project information that is dynamically generated based on the user’s authentication information.
- Status: You want to show the status of a service or system that is dynamically generated based on the user’s authentication information.
- Support: You want to allow users to read support information that is dynamically generated base on their authentication information. Maybe even submit a new ticket.
We’re going to use a simple example in this post, but you can expand on this to meet your needs.
Limitations
There are some limitations to using Microsoft Entra ID EasyAuth with Azure Static Web Apps in the scope of this post. We’ll be using the Free tier of Azure Static Web Apps, which has some limitations on custom roles
and permissions. If you need more advanced features, you may need to upgrade to a paid tier. There are limits to what Azure Functions within a Static Web App can do.
Checkout Microsoft’s documentaiton on all this:
- Static Web Apps pricing
- Azure Functions limitations for more information.
Prerequisites
You’ll need the following installed on your computer to follow along with this post:
- Node.js
- Install Astro with the Automatic CLI
- Azure Static Web Apps CLI & Azure Static Web Apps CLI overview
- Azure Functions Core Tools
At the time of this posting, the Azure Functions Core Tools are at version 4. I ran into an issue with it saying it won’t work with Node.js 20. Thus, I needed to install Node.js 18.20.2.
Installing Node Version Manager (nvm) and then installing Node.js 18.20.2 fixed this issue for me. You can install nvm with the following command:
nvm install 18.20.2nvm use 18.20.2After doing this, close down all your PowerShell windows to ensure nvm is working correctly. Then you can install the Azure Functions Core Tools with the following command:
Here are other posts that cover some of the prerequisites:
- Getting ready to use Astro
- Creating a Static Site with Astro, Azure Static Web Apps, and GitHub
- Using Microsoft Entra Id EasyAuth with Astro and Azure Static Web App
Let’s do some quick commands to install the items we need.
npm install -g @azure/static-web-apps-clinpm install -g azure-functions-core-tools@4 --unsafe-perm trueIf you have these, you’re ready to move on to the next steps.
Our Scenario: Baseball and Weather
In our scenario, we want to have an Astro site that has a public home page and a private page that requires authentication. From that private page, we’re going to fetch data from an Azure Function. The Azure Function will make an HTTP request to a public API and return the data to the site. The site will then show the data back to the user. Simple enough.
I love baseball, so we’re going to use a public API provided by Major League Baseball that will show us the current days games. We’ll also call the weather service from the United States NWS Weather Forecast Office (WFO) to get the weather for the games. We’ll show the games and the weather on the private page.
Doing this, we’ll be able to show how to use Azure Functions with Astro and Azure Static Web Apps. We’ll also show how to test this locally using the Azure Static Web Apps CLI and how to deploy it to Azure. It also removes the barrier of calling a private data source as we’re using public APIs.
You can follow along with this post to create your own project or you can jump ahead to the The Sample Project section just get things running.
Create the Astro Project
We’re going to start out with a new Astro project that’s pretty basic.
Let’s assume we’re going to run these commands in the following folder path, c:\dev. However, you can do this in any folder you’d like.
We need to create a folder for the project and then we’ll create the Astro project. Later, we’ll use the Azure Functions CLI to create the Azure Function and test locally.
We’ll need this folder due to an dependency issue with the Azure Functions CLI when we use swa deploy.
mkdir AstroFuncBallcd .\AstroFuncBallnpm create astro@latestThe setup wizard will ask you a few questions. Here’s how we’ll respond:
- Where should we create your new project?:
./AstroFuncBall - How would you like to start your new project?:
Include sample files (recommended) - Do you plan to write TypeScript?:
Yes - How strict should TypeScript be?:
Strict (recommended) - Install dependencies? (recommended):
Yes - Initialize a new git repository? (optional):
No
Add the Azure Functions API
We’re going to add an Azure Function to our project. We’re going to have the Azure Functions Core Tools to create a new Azure Function in the api folder. We’re
going to use the V4 model and and we’ll use Javascript as the language.
Assuming we’re still in the c:\dev\AstroFuncBall folder, we’ll first change directories to the Astro project we just created. Then we’ll create the Azure Function.
cd .\AstroFuncBallfunc init api --worker-runtime javascript --model V4We’re going to add a new function to the project called GetGamesToday and it will be an HTTP trigger function. We’ll use Javascript as the language.
Assuming you’re still in the c:\dev\AstroFuncBall folder, the following command will first change to the api folder and then add the new function.
cd .\apifunc new --name GetGamesToday --template "Http Trigger" --authlevel "anonymous"You’ll notice that the authlevel is set to anonymous. This is because we’re going to use the authentication system in Azure Static Web Apps to protect the API. We’ll configure this later in the post.
Verify Astro and Azure Functions
Let’s do a quick check to make sure everything is working. We’ll start the Astro site and then we’ll start the Azure Functions.
Start the Astro site
The next command will change our directory back to the root of our project (c:\dev\AstroFuncBall\AstroFuncBall) and then we’ll test out the Astro site.
cd ..npm run devOpen you browser and go to http://localhost:4321 to see the Astro site running. Just to make sure all is well.
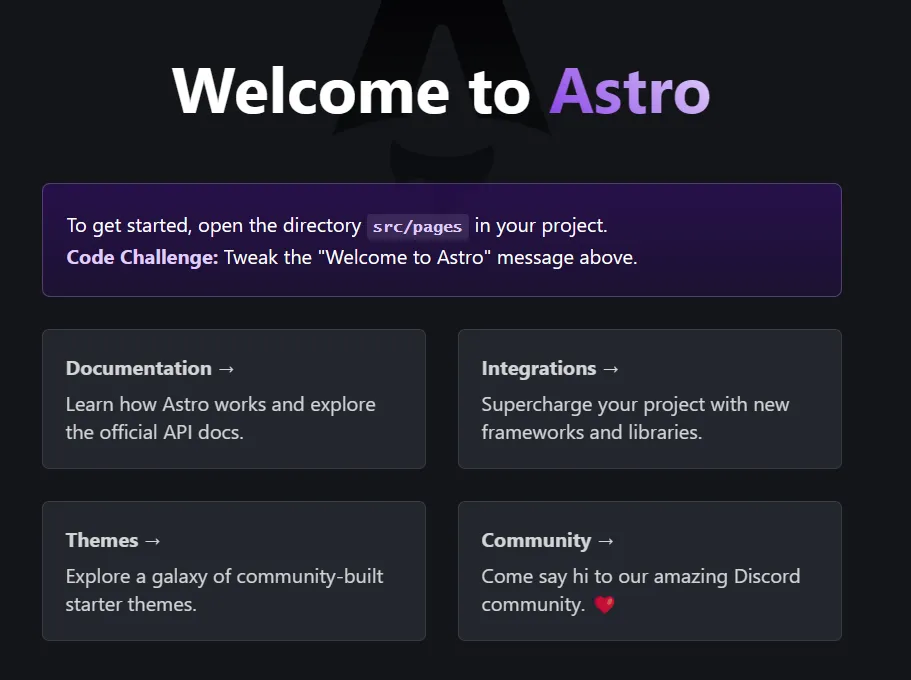
When you run npm run dev, you’ll see the URL you can use to access your site. It will be something like http://localhost:4321. This number could be different on your computer.
Make note of the URL (including port number) as you’ll need it later.
Let’s stop that process now. Simply press Ctrl+C in the PowerShell window to stop the Astro site. You may be asked to confirm that you want to stop the process. Just type y and press Enter.
Start the Azure Functions
Now let’s start the Azure Functions. Navigating from the root of the Astro project to the API first (c:\dev\AstroFuncBall\api), then we’ll start the Azure Function emulator.
cd .\apifunc startOpen your browser and go to http://localhost:7071/api/GetGamesToday to see the Azure Function running. If you see a Hello, world!’ message, then everything is working correctly.

This function will make an HTTP request to the Major League Baseball API and return the data to the site. We’ll use this function to get the games for the day.
Let’s stop that process now. Simply press Ctrl+C in the PowerShell window to stop the process.
Initialize and Start Static Web Apps (SWA) CLI
As you’ve seen, the Astro site and the Azure Functions site have different runtimes and ports. We’re going to use the Azure Static Web Apps CLI to run both of these at the same time.
This will allow us to test the site and the functions together. We’re going to initialize the Azure Static Web Apps CLI and then start the server. This will allow us to test the site and the functions together.
First, make sure you’re in the root of the project (c:\dev\AstroFuncBall) and NOT the folder where Astro and the api folder resides (c:\dev\AstroFuncBall\AstroFuncBall). Then run the following command to initialize the Azure Static Web Apps CLI.
cd ..\..\swa initThe Azure SWA CLI will first prompt for the following:
- Choose a configuration name:
astro-func-ball - Are these settings correct?:
n
We won’t accept the settings it gives us as it won’t work in our case. That’s why you selected n above.
Here’s how we’ll respond to the next set of questions:
- What’s your app location?:
AstroFuncBall - What’s your build output location?:
.\AstroFuncBall\dist - What’s your API location? (optional):
AstroFuncBall\api - What’s your API language? (optional):
Node.js - What’s your API version? (optional):
18 - What’s your data API location? (optional): Leave this blank
- What command do you use to build your app? (optional): npm run build
- What command do you use to build your API? (optional): npm start
- What command do you use to run your app for development? (optional): npm run dev
- What’s your app development server URL (optional):
http://localhost:4321 - What’s your API development server URL (optional): Leave this blank
Here’s what the configuration swa-config.json file looks like that was just created for us:
{ "$schema": "https://aka.ms/azure/static-web-apps-cli/schema", "configurations": { "astro-func-ball": { "appLocation": "AstroFuncBall", "apiLocation": "AstroFuncBall\\api", "outputLocation": ".\\AstroFuncBall\\dist", "apiLanguage": "node", "apiVersion": "18", "appBuildCommand": "npm run build", "apiBuildCommand": "npm start", "run": "npm run dev", "appDevserverUrl": "http://localhost:4321" } }}Now we’re going to start the Azure Static Web Apps CLI. This will start the Astro site and the Azure Functions site at the same time.
swa start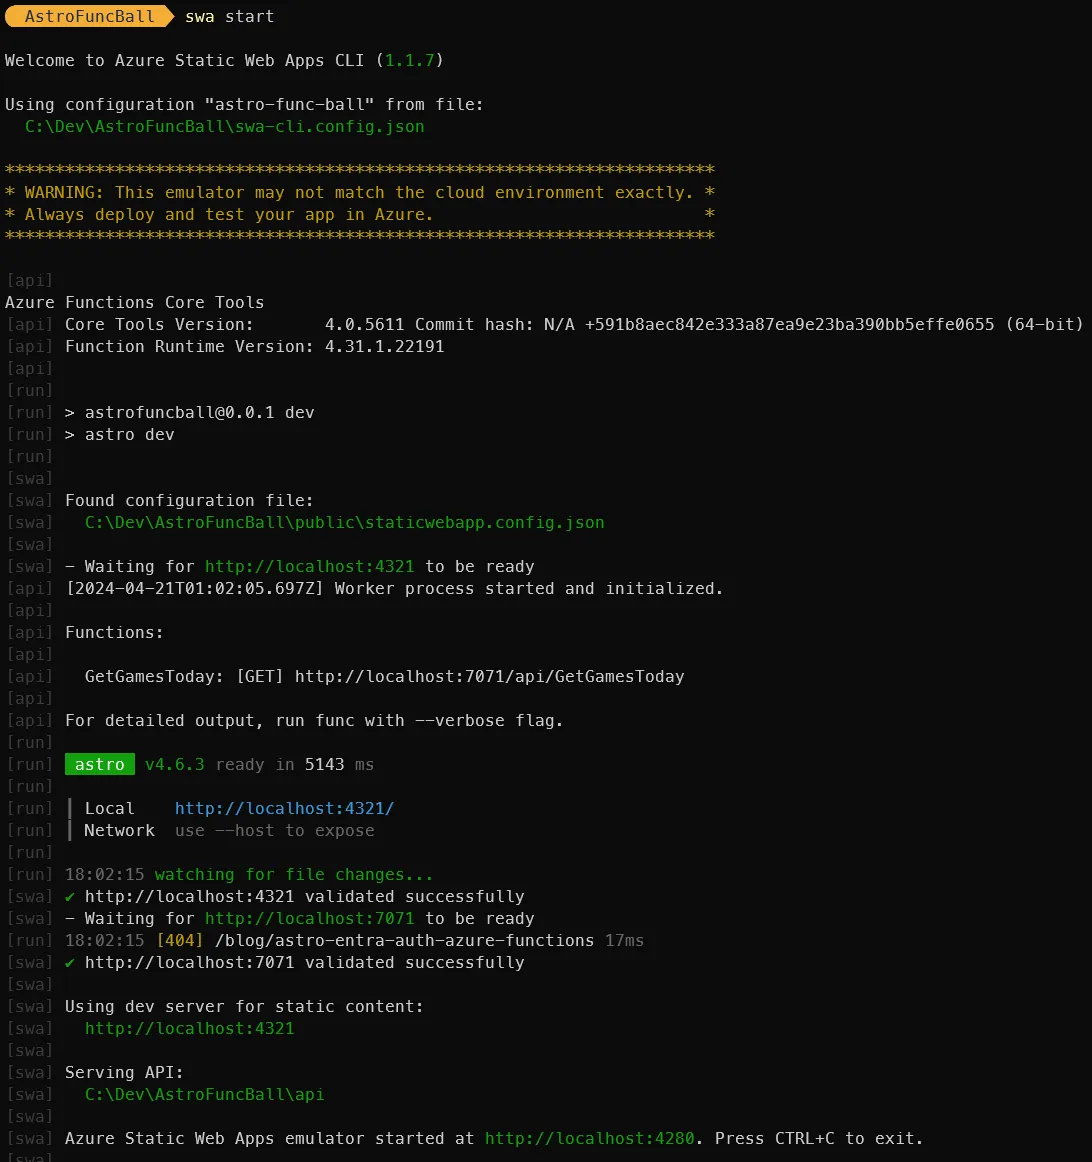
At this point, you have three active URLs (your ports may be different) running on your computer:
- Astro:
http://localhost:4321 - Azure Functions:
http://localhost:7071 - Azure Static Web Apps:
http://localhost:4280
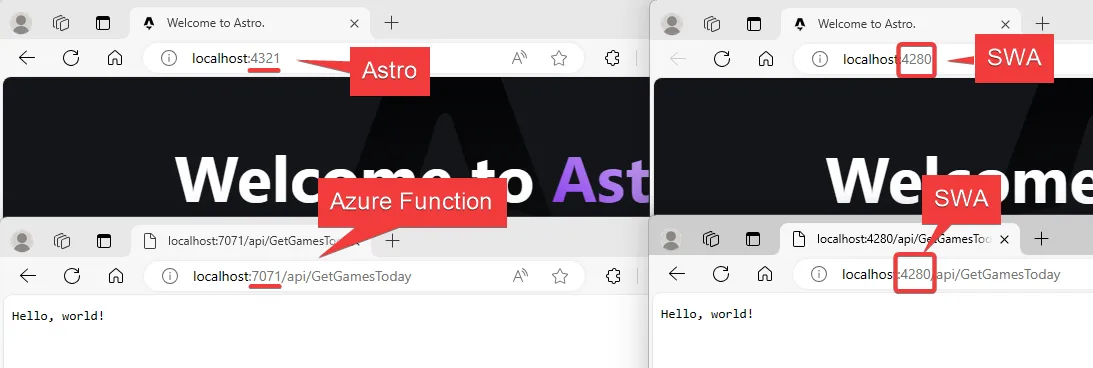
If you open your browser and go to the SWA url http://localhost:4280, you’ll see your Astro site running, but it’s being served by the Azure Static Web Apps CLI. This is the URL you’ll use to test the authentication system.
Let’s go to the SWA url, but add in the path to our first Function: http://localhost:4280/api/GetGamesToday. You should see the Hello, world! message.
Let’s stop that process now. Simply press Ctrl+C in the PowerShell window to stop the process.
Configure Azure Static Web Apps Authentication
Configuration of Azure Static Web Apps is done in the staticwebapp.config.json file. This topic and the sample project are based on the previous post on Entra ID EasyAuth with Astro. We’re going to
use the same authentication system in this post.
For this to work, you’ll need to add a staticwebapp.config.json file to the public directory of your Astro site (C:\Dev\AstroFuncBall\AstroFuncBall\public).
In the example below, we’ll create a folder named baseball within the pages directory and we’ll require authentication to access it.
We’ll also add a route for the path api as this will enforce authentication when our application (or otherwise on the Internet) calls it for the json data we expact back from the Azure Function.
Here’s an example of a staticwebapp.config.json file:
{ "trailingSlash": "auto", "globalHeaders": { "content-security-policy": "default-src https: 'unsafe-eval' 'unsafe-inline'; object-src 'none'" }, "mimeTypes": { ".json": "text/json" }, "routes": [ { "route": "/api/*", "methods": ["GET"], "allowedRoles": ["authenticated"] }, { "route": "/baseball/*", "methods": ["GET"], "allowedRoles": ["authenticated"] }, { "route": "/login", "rewrite": "/.auth/login/aad" }, { "route": "/logout", "redirect": "/.auth/logout" } ], "navigationFallback": { "rewrite": "index.html", "exclude": ["/images/*.{png,jpg,gif}", "/css/*"] }, "responseOverrides": { "400": { "rewrite": "/invalid-invitation-error.html" }, "401": { "statusCode": 302, "redirect": "/.auth/login/aad" }, "403": { "rewrite": "/custom-forbidden-page.html" }, "404": { "rewrite": "/404.html" } }}Resolving TypeScript Issues
Since I used TypeScript for the Astro site and the Azure Function, I ran into an issue where the TypeScript compiler was
complaining about statement in the Azure Function (File is a CommonJS module; it may be converted to an ES module.). This is because the Azure Functions CLI
uses the CommonJS module system and not the ES module system. To fix this, I an exclusion in the tsconfig.json file at the root of the Astro
site (C:\Dev\AstroFuncBall\AstroFuncBall\tsconfig.json).
The following is the end result.
{ "extends": "astro/tsconfigs/strict", "exclude": ["node_modules", "dist", "api", "scripts"]}Checkpoint: Astro, SWA, and Azure Functions
At this point, this might be enough to get you going on your own project. You’ve got Astro running, you’ve got Azure Functions running, and you’ve got the Azure Static Web Apps CLI running. You’ve also tested the Azure Functions.
If you have good Javascript skills and a pro at Astro, then you probably don’t need to read the rest of this post. The rest of this post, we’ll add in the fun part of the code to see how it all works together.
Sample Project: Clone & Run
Let’s go through a few areas in the sample project that are important to understand. Keep in mind that this is a basic example and you can expand on this to meet your needs.
I’m not going to walk you through all of the changes in the project we’ve been creating thus far, but instead I’ll explain the key parts based on the sample project from within GitHub.
Folders and Files
The following represents a subset of the files and paths in the project. Make note that the swa-cli.config.json is in the parent folder of the project folder where everything else resides.
/├── AstroFuncBall/│ ├── api/│ │ ├── components/│ │ │ └── baseball.js│ │ │ └── util.js│ │ │ └── weather.js│ │ ├── functions/│ │ │ └── GetGamesToday.js│ │ ├── sampledata/│ │ │ ├── games.json│ │ │ └── weather.json│ │ └── config.js│ ├── public/│ │ └── staticwebapp.config.json│ ├── src/│ │ └── pages/│ │ │ ├── baseball/│ │ │ │ └── index.astro│ │ │ ├── claims.astro│ │ │ └── index.astro│ └.env└── swa-cli.config.jsonClone the Sample Project
If you’d like to follow along with the sample project, you can clone it from GitHub. You can do this in the c:\dev folder or any folder you’d like.
git clone https://github.com/conradagramont/blog.gitcd .\blog\AstroFuncBall\AstroFuncBall\npm installnpm run build -mode productioncd .\apinpm installThe swa-cli.config.json file MUST be one folder up from where the rest of the project is. This is because the Azure Static Web Apps CLI will create a zip folder of the project and send it to Azure. If the swa-cli.config.json file is in the same folder as the rest of the project, it will fail to deploy.
Run Locally
Now let’s run the site locally. We’ll start the Azure Static Web Apps CLI and then we’ll start the Azure Functions. We can run this based on the swa config file or go more command line. we’ll provide both options.
SWA start via parameters
Run this from the root of the project (c:\dev\blog\AstroFuncBall\AstroFuncBall).
swa start http://localhost:4321 --run "npm start" --api-location ./apiSWA start swa-cli.config.json file
Run this from the root of the project (c:\dev\blog\AstroFuncBall).
swa startSample Project: About the App
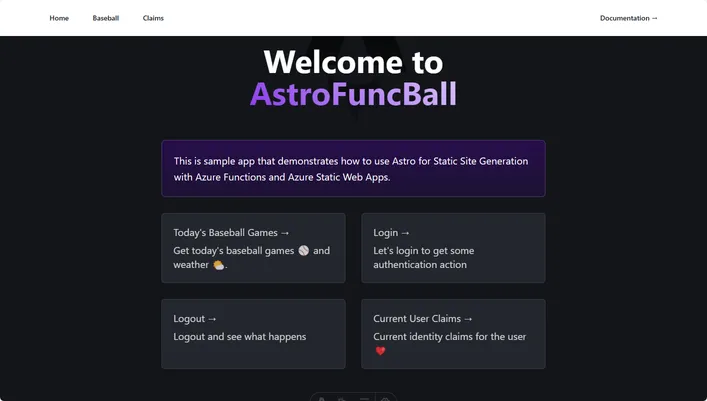
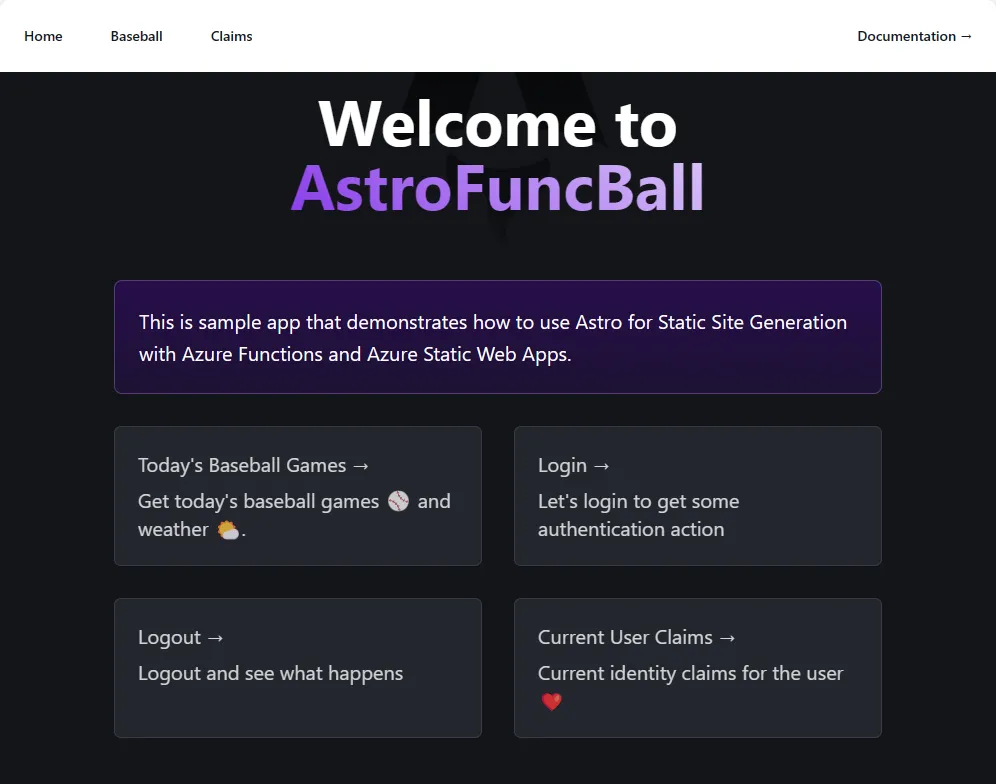
With your site running, you can access it at the URL provided by the Azure Static Web Apps CLI. For example, you can access the site at http://localhost:4280.
Page: Home
Path to file within project: src\pages\index.astro
The home page is a public page that anyone can access. Clicking on “Baseball” in the top navigation or Today's Baseball Games will take you to the page that requires authentication and will call the Azure Function.
Page: Baseball
Path to file within project: src\pages\baseball\index.astro
The baseball page requires authentication as defined in the staticwebapp.config.json. It will call the Azure Function which has additional server side code to call REST based calls to the Major League Baseball API and the National Weather Service API, then sends back and defined JSON string. The data is handled by a client side Javascript function.

Page: Claims
Path to file within project: src\pages\claims.astro
The claims page is an HTML version of calling the /.auth/me endpoint. This is a way to see the claims that are provided to the site when a user logs in. Since the staticwebapp.config.json file is configured to NOT require authentication,
for this page, you can access it without logging in. and see the emptiness.
This page includes Javascript code that will call the /.auth/me endpoint and show the claims that are provided to the site.
Link: Login & Logout
There is no code page for this in the project. The login and logout links direct the user to the Entra ID built-in authentication which we
configured in the staticwebapp.config.json file.
SWA Configuration
Noted earlier in this post, there are two configuration files when working with Azure Static Web Apps:
- staticwebapp.config.json - This file is used to configure the Azure Static Web Apps system.
- swa-config.json - This file is used to configure the Azure Static Web Apps CLI. This is for local development only. It will look for and behave based on the
staticwebapp.config.jsonfile.
Azure Function: GetGamesToday
The application uses an Azure Function and the following are the key files and folders.
- Path to file within project:
api\src\functions\GetGamesToday.js- Main entry point for the Azure Function.
- Path to file within project:
api\src\components\util.js- The Azure function calls into this Javascript file to get the data from the Major League Baseball API and the National Weather Service API.
- Path to file within project:
api\src\components\baseball.js- Helper functions util.js uses to get the data from the Major League Baseball API and the National Weather Service API.
- Path to file within project:
api\src\components\weather.js- Helper functions util.js uses to get the data from the National Weather Service API.
- Path to file within project:
api\src\config.js- Configuration file used to control if the data is coming from the API or from the sample data. (default: sample data)
// Create a configuration object that will be used by components/weather.js to decide if we use sample data or call the weather API directlymodule.exports = { config: { useSampleData: true }};You may run this for the first time and be able to get to the Baseball page, but you didn’t get prompted for authentication. Here’s some ideas on why this might be happening:
- You’re already logged in. If you’re already logged in, you won’t be prompted to log in again. You can log out by going to the
Logoutlink in the top navigation. - You’re not using the SWA CLI url:port.
- Maybe something is not configured correctly in the
staticwebapp.config.jsonfile.
When you do get asked for authentication, there is a local development experience and a production experience. The local development experience is a bit different than the production experience.
The local development experience is a bit more relaxed and doesn’t require as much consent as the production experience.
Let’s add in the following information to mimic a user logging in who is an administrator. You can use the following information:
- Identity Provider:
aad - User ID:
12345678-1234-1234-1234-123456789012 - User Name:
conrad@agramont.net - User’s roles
anonymousauthenticated
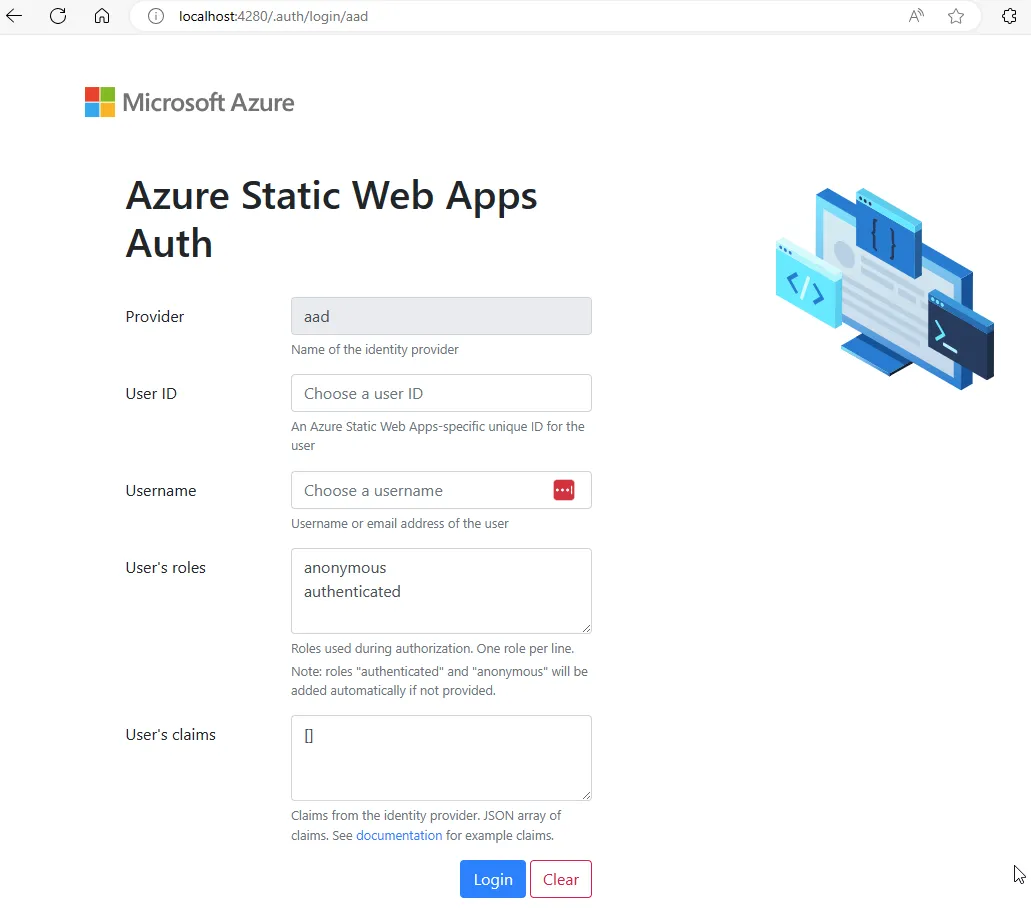
We’ll leave User’s claims blank. Once you’ve added this information, click the Log in button.
You can learn more about the production experience in the Entra ID EasyAuth with Astro post.
Both in the local development experience and the production experience, you’ll should test the authentication protection of the API.
- Make sure you Logout of the site.
- Go to the Claims link and see that your claims are empty.
- Navigate to the
/api/GetGamesTodaydirectly. You should be prompted to log in.
Deploy to Azure Directly
Unlike previous posts where I show how to deploy via GitHub, we’re going to deploy directly to Azure. This is because we’re using the Azure Functions CLI to run the site locally. We can’t use the GitHub Actions to deploy the site.
Install AZ CLI and the Static Web Apps Extension
To deploy the site to Azure, we’re going to use Az CLI. You can install the Az CLI from here.
With the Az CLI installed, you still may need to install the specific extension for Azure Static Web Apps. Using PowerShell, you can run the following command to see if the extension is installed.
az extension list-available | ConvertFrom-Json | Where-Object { $_.name -eq "staticwebapp" } | Format-listThe folowing output shows that the extension is not installed.
experimental : Falseinstalled : Falsename : staticwebapppreview : Truesummary : Microsoft Azure Command-Line Tools Staticwebapp Extensionversion : 1.0.0You can install it with the following command:
az extension add --name staticwebappOnce you have the Az CLI installed, you can run the following command to deploy the site to Azure.
Let’s now login to Azure. You can do this by running the following command:
Login to Azure and Create the Static Web App
az loginIf you have access to multiple subscriptions, you can set the subscription you want to use with the following command:
az account set --subscription <your-subscription-id>The following command will deploy the site to Azure. You’ll need to replace:
<your-app-name>with the name of your app<your-location>with the location you want to deploy to.<resource-group-name>with the name of the resource group you want to use. (you can create a new one or use an existing one before running this command)
By default, the --sku is set to Free. Thus, no need to add it to the command.
# Example: az staticwebapp create -n "AstroFuncBall" -g "blogdemos" -l "eastus2"az staticwebapp create -n <your-app-name> -g <resource-group-name> -l <your-location>The output here will be a URL that you can use to access your site. You can also find this in the Azure Portal. (Data modified for security)
{ "allowConfigFileUpdates": true, "branch": null, "buildProperties": null, "contentDistributionEndpoint": "https://content-eus2.infrastructure.5.azurestaticapps.net", "customDomains": [], "databaseConnections": [], "defaultHostname": "orange-wave-045e8b50f.5.azurestaticapps.net", "enterpriseGradeCdnStatus": "Disabled", "id": "/subscriptions/01guid9c-guid-guid-guid-eguid8/resourceGroups/blogdemos/providers/Microsoft.Web/staticSites/AstroFuncBall", "identity": null, "keyVaultReferenceIdentity": "SystemAssigned", "kind": null, "linkedBackends": [], "location": "East US 2", "name": "AstroFuncBall", "privateEndpointConnections": [], "provider": "None", "publicNetworkAccess": null, "repositoryToken": null, "repositoryUrl": null, "resourceGroup": "blogdemos", "sku": { "capabilities": null, "capacity": null, "family": null, "locations": null, "name": "Free", "size": null, "skuCapacity": null, "tier": "Free" }, "stagingEnvironmentPolicy": "Enabled", "tags": null, "templateProperties": null, "type": "Microsoft.Web/staticSites", "userProvidedFunctionApps": null}In the result, you’ll see the attribute defaultHostname which is the URL you can use to access your site. This is generic URL that Azure creates for you. You can add a custom
domain later to provide a more friendly URL.
The URL reference in this post will be deleted prior to publishing.
Azure Static Web Apps will have a Deployment Token that you can use to deploy the site. Let’s run a command that gives this to us. (Never save this is a public place.)
az staticwebapp secrets list --name "AstroFuncBall"This will give us the following Json output (Data modified for security):
{ "id": "/subscriptions/01guid9c-guid-guid-guid-eguid8/resourceGroups/blogdemos/providers/Microsoft.Web/staticSites/AstroFuncBall/secrets", "kind": null, "location": "East US 2", "name": "secrets", "properties": { "apiKey": "Your-Deployment-Token", }, "resourceGroup": "blogdemos", "type": "Microsoft.Web/staticSites/secrets"}Deploying to Azure using SWA CLI
Finally, let’s deploy the site to Azure using the deployment token and the SWA CLI. We’ll do this from the root of the project (C:\Dev\AstroFuncBall) as this
contains the swa-cli.config.json file.
If you’ve been following along from the beginning or you found this post trying to resolve an issue. You might get the following error:
The content server has rejected the request with: BadRequestℹ Reason: The size of the function content was too large. The limit for this Static Web App is 104857600 bytes.This is caused by the azure-functions-core-tools referenced in devDependencies in the AstroFuncBall\api\package.json file. You
might think that the .funcignore file in api folder would exclude the node_modules folder, but it doesn’t. Here’s what you can do to fix this.
Remove the azure-functions-core-tools from the devDependencies in the AstroFuncBall\api\package.json file. You can delete it directly or run the following command:
# You must already be in the C:\Dev\AstroFuncBall\AstroFuncBall\api folder pathnpm uninstall azure-functions-core-toolsFinal
{ "name": "", "version": "1.0.0", "description": "", "main": "src/functions/*.js", "scripts": { "start": "func start", "test": "echo \"No tests yet...\"" }, "dependencies": { "@azure/functions": "^4.0.0" } }, "devDependencies": { "azure-functions-core-tools": "^4.0.5611" }}Your AstroFuncBall\api\package.json file should now look like this:
{ "name": "", "version": "1.0.0", "description": "", "main": "src/functions/*.js", "scripts": { "start": "func start", "test": "echo \"No tests yet...\"" }, "dependencies": { "@azure/functions": "^4.0.0" }}If you have applied these changes. delete the node_modules folder in the AstroFuncBall\api folder. Then run the following command to install the dependencies again.
# You must already be in the C:\Dev\AstroFuncBall\AstroFuncBall\api folder pathdel .\node_modules\npm installNow you can deploy the site to Azure using the following command from the root project folder (C:\Dev\AstroFuncBall):
swa deploy --env "Production" --deployment-token "Your-Deployment-Token" --verbose sillyThe —verbose silly flag will give you a lot of information about the deployment. You can remove this flag if you don’t want to see all the information.
Redeploying to Azure Tips
Each time you make a change to your local code and want to deploy it to Azure, you’ll need to run the following:
# Run from C:\Dev\AstroFuncBall\AstroFuncBall\ to build Astro for productionnpm run build -mode production# Run from C:\Dev\AstroFuncBall to deploy to Azurecd ..swa deploy --env "Production" --deployment-token "Your-Deployment-Token" --verbose sillyWhat’s Next?
While a length post, I hope it provides enough information to get you started with Azure Functions, Astro, and Azure Static Web Apps. I wouldn’t recommend this deployment model for production, but it’s a great way to get started with these technologies. I’d recommend using automated deployments via GitHub Actions or Azure DevOps for production deployments.
Acknowledgements & Terms
I’d like to acknowledge the following that helped me with this post, as well as the terms and conditions of the APIs used in this post:
Series: Astro
This post is part of a series.
Next Topic: Using Azure Functions with Astro and Entra ID Authentication
Feel free to leave a comment below. Keep in mind that all comments are moderated and will be approved before being published.