There are many ways to integrate with Microsoft 365 services such as Microsoft Teams, SharePoint, and Outlook using the Microsoft Graph API. The Microsoft Graph API is a RESTful web API that allows you to interact with Microsoft 365 services. Microsoft provides the Microsoft Graph Toolkit which is a collection of reusable, framework-agnostic web components that can be used to build web applications that interact with Microsoft Graph.
If you’re a developer building a static site, you’ll get the best of both worlds by using the Microsoft Graph Toolkit with a Static Site Generator (SSG) like Astro. The Microsoft Graph Toolkit will handle the authentication and data retrieval from Microsoft 365 services, while the SSG will generate static HTML files that can be hosted on a static web server. This approach allows you to build dynamic web applications that can be deployed to a static web server without the need for a server-side component.
In this post, we’ll show how to use the Microsoft Graph Toolkit with Astro for client-side integration with Microsoft 365 services. We’ll explain the basics of how and why you’d want to use the Microsoft Graph Toolkit, and in this case work with a Static Site Generator (SSG) like Astro. We’ll also show one key requirement of creating an Entra ID App Registration to authenticate with Microsoft 365 services.
Best of all, we have a sample project that you can use to get started.
Table of Contents
- What is the Microsoft Graph Toolkit?
- Sample: AstroGraphToolkit
- Create an Entra ID App Registration
- Adding to Existing Astro Project
- Admin and User Consent
- Sample Project: AstroGraphToolkit
- Conclusion
What is the Microsoft Graph Toolkit?
The Microsoft Graph Toolkit is a collection of libraries that make it easy to work with Microsoft Graph. The Microsoft Graph Toolkit provides a set of reusable, framework-agnostic web components that can be used to build web applications that interact with Microsoft Graph. The Microsoft Graph Toolkit handles the authentication and data retrieval from Microsoft 365 services, so you can focus on building your web application.
- Documentation: Microsoft Graph Toolkit
- Playground: Microsoft Graph Toolkit Playground
Sample: AstroGraphToolkit
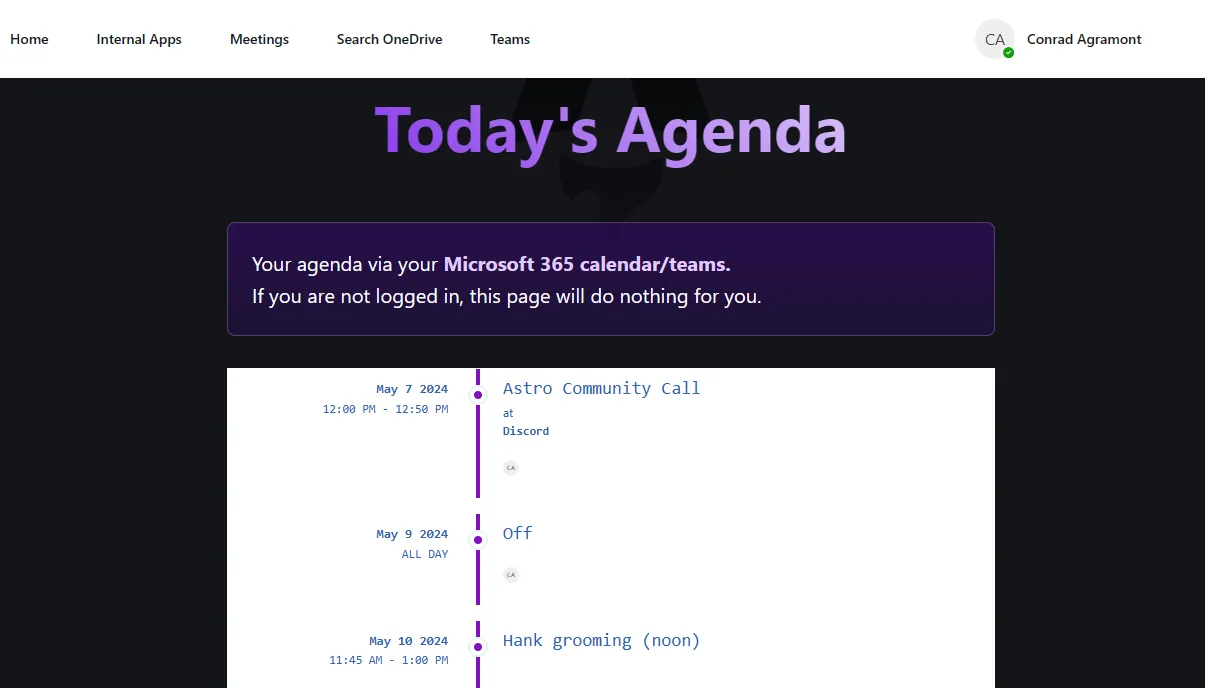
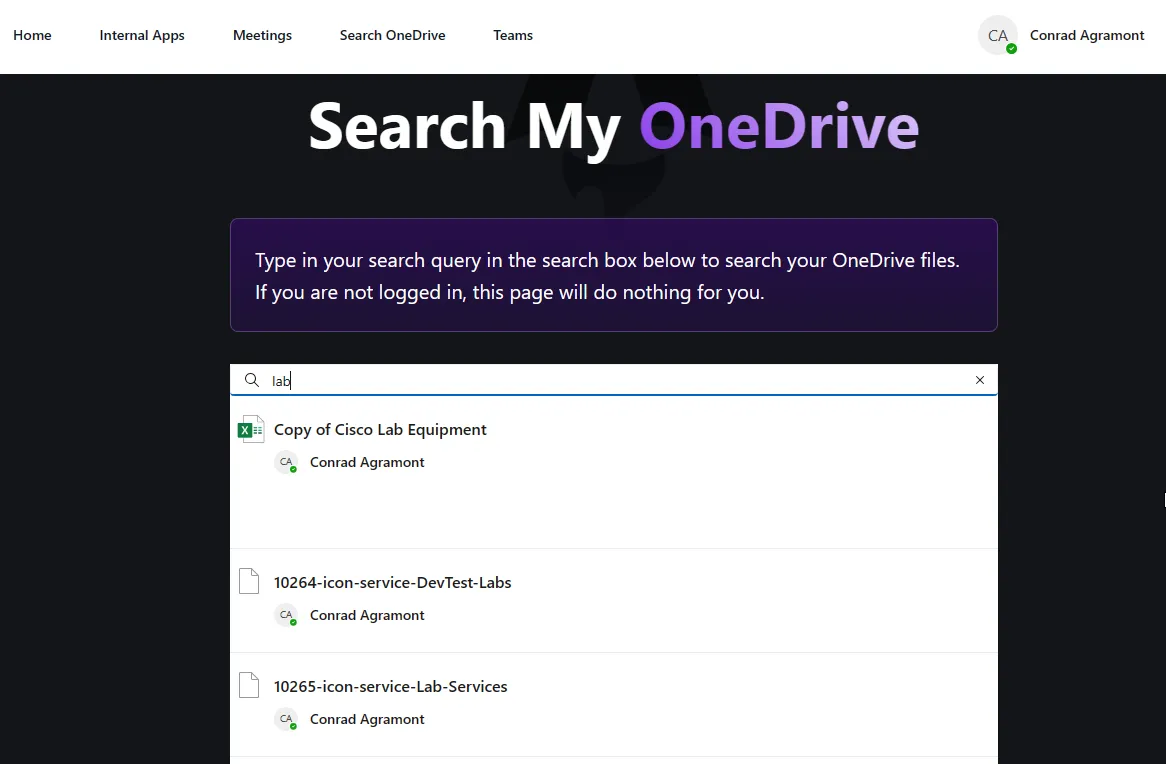
AstroGraphToolkit is a sample web site that shows how to use the Microsoft Graph Toolkit for client side integration with Microsoft 365.
The site is based on Astro with minimal additions to show how the static content is updated base on client side interactions with the Microsoft Graph Toolkit.
Deployment of the site has zero requirements to be deployed within Microsoft Azure. Thus, it could be deployed on a local server, Amazon Web Services, Vercel, Netlify, etc. Regardless of where it’s deployed, authentication and Microsoft Graph interactions will work.
Unlike a previous blog post, Using Microsoft Entra Id EasyAuth with Astro and Azure Static Web App, the authentication is not based on, nor requires, configuration and deployment of Azure Static Web App.
You can find this sample site in the AstroGraphToolkit GitHub repository
Create an Entra ID App Registration
An App Registration with Entra ID defines the permissions and settings that the app will use to interact with Microsoft 365 services. We’ll use the Azure Portal method to create the App Registration.
- Open the Azure Portal and navigate to the
Microsoft Entra IDblade. - Click on “App registrations” and then “New registration”.
- Enter a name for the app registration and select the supported account types. In this example, we’ll use the following:
- Name:
AstroGraphToolkit - Supported account types:
Accounts in this organizational directory only (Single tenant) - Redirect URI (optional):
- Select a platform:
Web - Redirect URI:
http://localhost:4321
- Select a platform:
- Name:
- Click “Register”.
- Copy the Application (client) ID and Directory (tenant) ID. We’ll use these values later. In our example, these were the values
- Application:
5b4f7809-e123-4e37-a0d3-661687c0a3fd - Directory:
0611c2d5-52a3-4c87-83fc-81903228fa38
- Application:
Secrets and Certificates
At this point, it’s common to create either a secret or certificate to provide a way for the app to authenticate with Entra ID. However, we’ll use the Microsoft Graph Toolkit to handle the authentication. Thus, we don’t need it.
App Permissions
App Registration requires permissions to access Microsoft 365 services. In our example, we’ll need the following permissions:
- User.Read: Allows the app to read the profile of the signed-in user.
- Calendars.Read: Allows the app to read events in the user’s calendar.
- Files.Read.All: Allows the app to read items in all site collections without a signed in user.
As a best practice, you’ll wan to grant the least amount of permissions necessary for your app to function. In our example, we’re granting broad permissions for demonstration purposes.
The permission type we’ll use is Delegated. This means that the app will act on behalf of the signed-in user. This is the most common permission type for web applications.
Using the Application permissions are handy, it’s not recommended for web applications as it gives the application itself full access to a given resource above what the signed-in user has.
For the purposes of this example, we won’t define any permissions. Instead, we’ll let the app request permissions as needed. You’ll find this to be redundant as you navigate the app, but it’s a good way to understand how permissions are requested and granted.
Adding to Existing Astro Project
Now that you have an App Registration, let’s add in the very basics of the Microsoft Graph Toolkit to your Astro project.
Add the Microsoft Graph Toolkit
The Microsoft Graph Toolkit is a collection of libraries that make it easy to work with Microsoft Graph. We’ll use this toolkit to interact with Microsoft 365 services.
The following code snippet is an example of adding the Microsoft Graph toolkit with a basic login component and pointing to the App Registration we created earlier.
In the sample project, this is added a component called graphLogin.astro and then added to the header.astro file to ensure it’s loaded on every page.
In the code snippet below, you see how the scopes are defined. As well as the clientId and authority values.
The clientId is the Application ID from the App Registration. The authority is the Directory ID from the App Registration.
<script type="module" is:inline> import { registerMgtComponents, Providers, ProviderState, Msal2Provider } from "https://unpkg.com/@microsoft/mgt@4"; Providers.globalProvider = new Msal2Provider({ clientId: "5b4f7809-e123-4e37-a0d3-661687c0a3fd" , scopes: ["user.read", "calendars.read", "Files.Read.All"], authority: "https://login.microsoftonline.com/0611c2d5-52a3-4c87-83fc-81903228fa38", redirectUri: "http://localhost:4321/", }); registerMgtComponents(); </script> <div id="main"> <mgt-login show-presence login-view="compact"></mgt-login> </div>Getting Microsoft Teams data
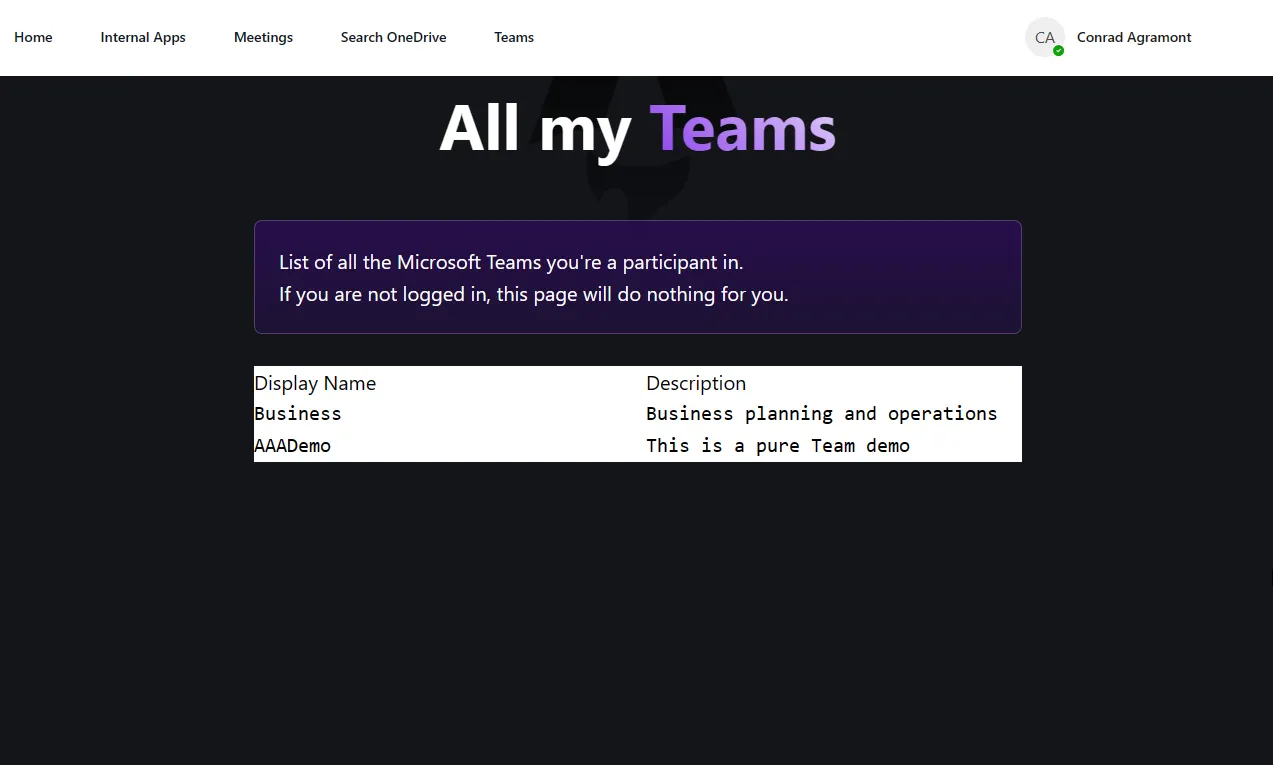
Now that we have the Microsoft Graph Toolkit added to our Astro project, we can start getting data from Microsoft 365 services. In this example, we’ll show how to get data from Microsoft Teams.
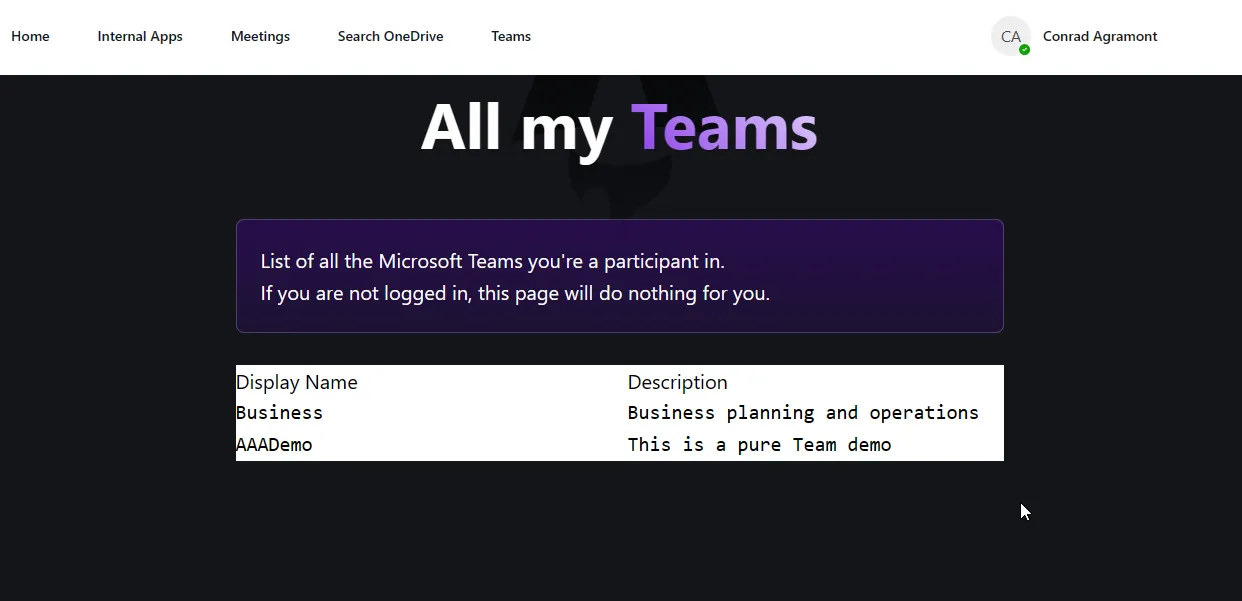
The following code snippet is an example of getting the user’s Microsoft Teams data. This code is added to a component called graphTeams.astro and then added to the index.astro file to ensure it’s loaded on the home page.
<mgt-get resource="/me/joinedTeams" scopes="Directory.Read.All"> <template data-type="value"> <div class="bg-white text-black grid grid-cols-2 gap-4"> <div> <pre is:raw>{{this.displayName}}</pre> </div> <div> <pre is:raw>{{this.description}}</pre> </div> </div> </template></mgt-get>In the code snippet above, you see how the resource is defined. In this case, we’re getting the user’s joined teams. The scopes are defined as Directory.Read.All. This
is a broad permission that allows the app to read all teams in the directory, but only the teams the user is a member of.
Admin and User Consent
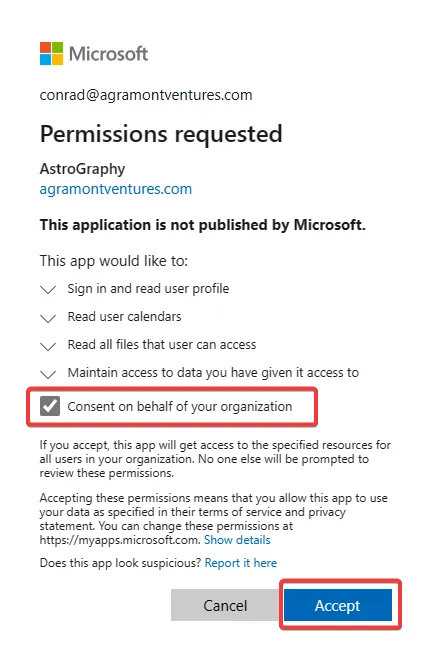
Just because the app requests permissions directly or defined in the App Registration doesn’t mean that’s all that’s needed. The user must consent to the permissions requested. And based on the permissions requested, it may require an administrator to consent on behalf of the organization. This is known as admin consent.
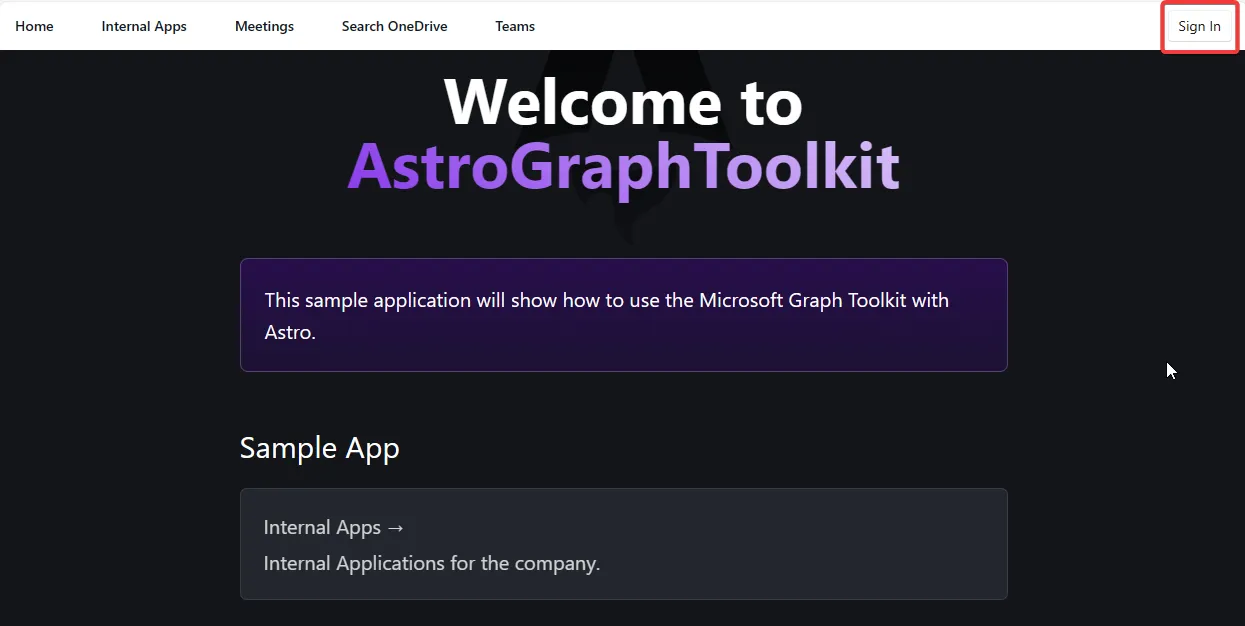
Using our sample application as an example, once you’ve logged in, you’ll see a consent screen that shows the permissions requested. When running the app for the first time, you’ll see the following:
At this point, nothing has really happened yet that requires admin consent. You can see the “Sign In” button at the top right. This is using the snippet we added earlier to the graphLogin.astro file.
When you click “Sign In”, you’ll see the following which is a redirection to the Entra Login for OAuth2 (https://login.microsoftonline.com/) which combines the clientId, authority, scopes and more.
The user must login (image not provided) and then consent to the permissions requested.
The following is the consent screen that shows the permissions requested. You’ll see that I selectred “Consent on behalf of your organization” which is admin consent.
Once consent is granted, the app will now be listed in the Entra ID under Enterprise Applications. This is where you can see the app, the permissions granted, and the users and groups that have access to the app.
It’s the combination of the App Registration and the Enterprise Application that allows the app to interact with Microsoft 365 services.
Sample Project: AstroGraphToolkit
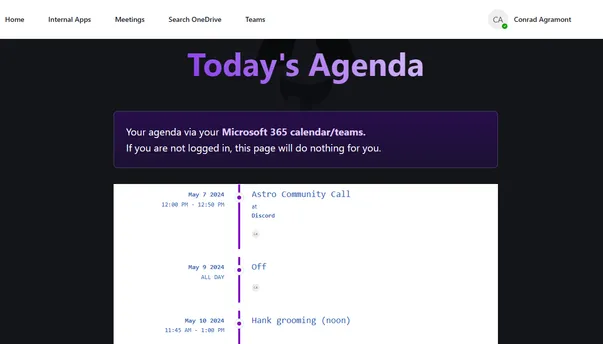
Here are some quick screenshots of what you’ll find in the AstroGraphToolkit sample project.
You can find this sample site in the AstroGraphToolkit GitHub repository
Conclusion
There’s WAY more to what you can do with Entra ID and the Microsoft Graph Toolkit. This is just the beginning. The Microsoft Graph Toolkit provides a lot of components that can be used to interact with Microsoft 365 services. You can find more information in the Microsoft Graph Toolkit documentation.
I plan on expanding on this topic and more regarding Entra ID and the Microsoft Graph while using Astro. Stay tuned for more!
